|
Step
2: Converting Ripped Files
DVDx will convert your .ifo files from smartripper into MPEG1
or MPEG2 format.
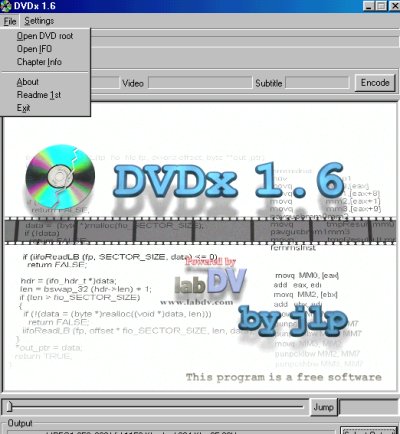
1. Open
DVDx, select File then select Open IFO
2. Then find the directory on your
harddrive with your movie you extracted with smartripper.
This will be a file that
has an .IFO extension that was created with the smartripper
3. select ntsc frame rate
of 29.97 if you live in the U.S. otherwise select "output frame rate to
25.0 for "Pal"
make sure all the other settings
match up with the ones in figure below.
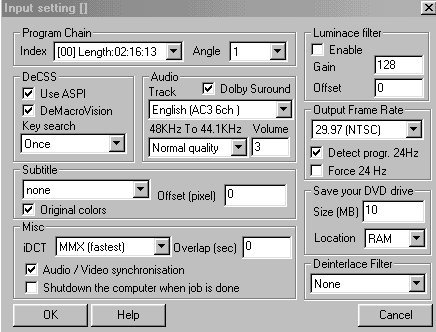
Notice that the movie length shows up
in the field box "index" which shows [00]Length:02:16:13
This is showing the length of this particular
movie which is 2 hours 16 minutes and 13 seconds.
3a. Also make sure you select
"audio/video synchronisation"
4. Now click ok. If
you happen to get a warning just click ok as this is not a problem.
the screen will now show a black screen
which is the beginning of your movie. You can now scroll through
the movie with the slidebar and see all your frames of the movie.
5. Now select settings and then
click output setting and this screen will appear.

6. In the "output setting" window
you want to make sure you have 352X240 resolution if you are in the U.S.
Otherwise if you live in Europe, Australia, etc then you would have the
resolution as 352X288 for PAL
7. By default the maximum
number of frames to encode is 1,000. However you want to change
this and grab all the frames of yourmovie. So make sure you click
on the "whole" button as this will grab your whole movie to encode.
As soon as you do this you will see the number of frames to encode will
change to show your entire movie number of frames.
8. For the "volume don't exceed"
you can leave this on "custom size" for settings as this is the default
setting.
9. If you have a movie that has
a frame rate of 23.976HZ then you want to select the
"Pulldown 3.2" so it is checked.
What this does is convert the 23.976 HZ to 29.97 HZ (NTSC only).
However, most movies will be already
at the 29.97 HZ, so you will not have to select this
10. In the field entitled "calculation"
you will notice it is set by default to "MMX" What this means is
that this works on Intel MMX Processors, which for most of you will work.
If you happen to have a computer with an AMD chip then you would select
"MMX + 3D now"
11. click pulldownThen click the
"apply" button and this screen will close.
12. Now click the "select output"
button at the bottom of the window. Then click browse to choose
a location to save your .mpg file and then give a name for your file
13. Finally, click "save" and then
"ok"
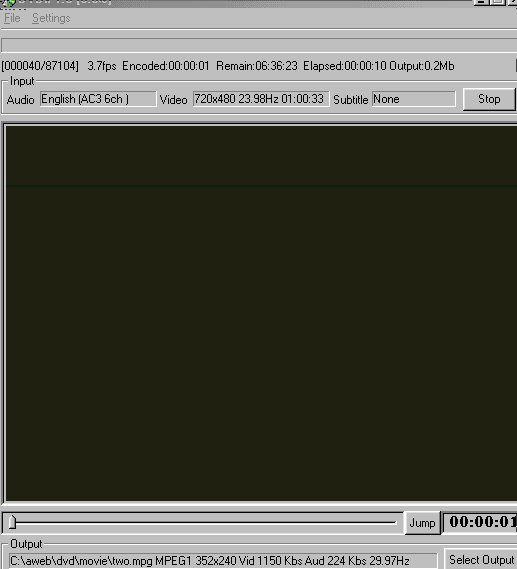
14. now click the "encode" button
to start the process. The screen below shows the process
in action after I clicked the "encode"
button. You will see at the top of the screen the
amount of time encoded , then it will
show the remaining time to encode. As you
can see, I just started encoding and it
will take 6 hours 36 minutes and 23 seconds to encode this.
I am using a 500 MHZ Pentium III.
If you have the newer Pentium IV with 1.0 GHZ or
faster your time will be much less.
However, you can set this up at night
and let it run and will be done when you get up in the morning.
When the process is finished, you can watch
your new mpeg with a utility like windows media player, or any mpeg player
you might have on your computer.
Now what needs to be done is to convert
the mpeg to vcd format. click below to to go next step.
Step
3: Converting the Mpeg Files to VCD Format And Burn to CDR (using vcdeasy)
|